
This tutorial assumes that you have competed Schematic Tutorial 1 FreePDK15:Analog Artist with HSPICE previously.
The setup_freepdk15 command sets your default simulator. As such, you need to delete your .cdsinit file prior to running the setup_freepdk15 command will copy a new .cdsinit file to your present directory switching the default simulator to synopys HSPICE instead of hspiceD. It will also add a new line setting the default FET libraries for synopsys HSPICE. Te results are the automatic changes of the .cdsinit file if you delete the file from your project directory prior to running the setip_freepdk15 command. If you don’t delete it first then you need to manually modify the file to reflect the below portion. If you already have Virtuoso open, you will need to exit first. Again, this just changes the default environment so you don’t have to change from hspiceD to HSPICE in the simulator setup directory and manually add the FET Model Libraries for the FreePDK for that simulator.
Simulator:

Previous:

;Modified 11/15/2017 W. Shepherd Pitts PhD (NCSU)
;Sets the default simulator for ADE
;https://support.cadence.com/apex/ArticleAttachmentPortal?id=a1Od0000000nWDPEA2&pageName=ArticleContent&sq=0050V000006L8E9QAK_20171115205436976
envSetVal( "asimenv.startup" "simulator" 'string "hspiceD")
;envSetVal( "asimenv.startup" "simulator" 'string "HSPICE")

New:

;Modified 11/15/2017 W. Shepherd Pitts PhD (NCSU)
;Sets the default simulator for ADE
;https://support.cadence.com/apex/ArticleAttachmentPortal?id=a1Od0000000nWDPEA2&pageName=ArticleContent&sq=0050V000006L8E9QAK_20171115205436976
;envSetVal( "asimenv.startup" "simulator" 'string "hspiceD")
envSetVal( "asimenv.startup" "simulator" 'string "HSPICE")

FET Model libraries should be updated to include:

;Modified 1/24/2018 W. Shepherd Pitts PhD (NCSU)
;Sets Default Model File Lists for HSPICE
;https://support.cadence.com/apex/techpubDocViewerPage?xmlName=anasimhelp.xml&title=Virtuoso%20Analog%20Design%20Environment%20L%20User%20Guide%20--%20Environment%20Setup%20-%20Environment%20Setup&hash=1025530&c_version=6.1.6&sq=0050V000006L8E9QAK_2017111619511202&path=anasimhelp/anasimhelp6.1.6/chap2.html#1025530
asiSetEnvOptionVal(asiGetTool('HSPICE) "modelFiles"
list(
list(strcat(getShellEnvVar("PDK_DIR") "/hspice/models/fet.inc"), "CMG")
;list("#" "/usr1/models/model3.scs")
))
To start your environment:
In a terminal go to your desired directory and follow these steps
setup_freepdk15
module load synopsys/2021 xcelium/21.03 spectre/20.10 ic/6.18-270
virtuoso&
Virtuoso will open as well as the CIW. Now it is time to check to make sure the HSPICE tools loaded correctly:
BAD LOAD (you need to exit cadence, rename or delete the .cdsinit file, and run the setup_freepdk15 (the source $PDK_DIR/cdslib/setup/setup_2018.sh or setup_2018.csh file):

If you see something like this in the CIW then you are good to go!
COPYRIGHT (C) 1992-2017  CADENCE DESIGN SYSTEMS INC.  ALL RIGHTS RESERVED.
          (C) 1992-2017  UNIX SYSTEMS Laboratories INC.,
                         Reproduced with permission.

This Cadence Design Systems program and online documentation are
proprietary/confidential information and may be disclosed/used only
as authorized in a license agreement controlling such use and disclosure.

          RESTRICTED RIGHTS NOTICE (SHORT FORM)
Use/reproduction/disclosure is subject to restriction
set forth at FAR 1252.227-19 or its equivalent.
Program:		@(#)$CDS: virtuoso version 6.1.7-64b 06/01/2017 16:38 (sjfhw316) $
Sub version:		sub-version  IC6.1.7-64b.500.12  (64-bit addresses)
Loading geView.cxt
Loading menuBuilder.cxt
Loading schView.cxt
Loading selectSv.cxt
Loading pvsui.cxt.
Loading wireEdit.cxt
Loading pte2.cxt
Loading xlUI.cxt
Loading auCore.cxt
Loading vhdl.cxt
Loading seismic.cxt
Loading ci.cxt
Loading ams.cxt
Virtuoso Framework License (111) was checked out successfully. Total checkout time was 0.04s.
Loading HSPICE.cxt
Loading oasis.cxt
Loading analog.cxt
Loading cdf.cxt
  ==== HSPICE-ADE Interface, M-2017.03-SP1 BUILD (05/22/2017 02:57:51) ====
  ==== COPYRIGHT 2008-2018 SYNOPSYS INC.                               ====
  ==== HSPICE-ADE Interface installed successfully                     ====
  HSPICE-ADE: use interface at '/ncsu/synopsys2017/hspice/interface'
  HSPICE-ADE: use HSPICE at '/afs/eos.ncsu.edu/dist/synopsys_apps/hspice_vM-2017.03-SP1/hspice/bin/hspice'
  HSPICE-ADE: HSPICE Version M-2017.03-SP1 linux64 (build id: 4532262; build date: May 22 2017 02:52:00)
loading vars from /afs/eos.ncsu.edu/lockers/research/ece/wdavis/tech/FreePDK15/cdslib/setup/cdsenv for tool layout
---------------------------------------------------------------------------
Welcome to the FreePDK 15nm Free, Open-Source Process Design Kit

---------------------------------------------------------------------------

Done loading FreePDK customizations.
Loading spectrei.cxt
Loading devCheck.cxt
Loading relXpert.cxt
Loading hspiceD.cxt
Loading spectreinl.cxt
Loading UltraSim.cxt
Loading pe.cxt
Once everything is good to go, you now want to go to the Library Manager and open your inverter testbench schematic and then ADE L per Schematic Tutorial 1 (Analog Artist with hspiceD).
Once you launch ADE L you then need to change the simulator to HSPICE instead of HspiceD in ADE L -> Setup ->Simulator/Director/Host.

Next, make sure the model files are present due to the switch to synopsys HSPICE. ADE L -> Setup -> Model Libraries… . You should see a line that says: /afs/eos.ncsu.edu/lockers/research/ece/wdavis/tech/FreePDK15/hspice/models/fet.inc and CMG next to it for Section.
Next, you need to setup the outputs from HSPICE simulator. You can do this by going to ADE L -> Results -> Plotting Assistant…
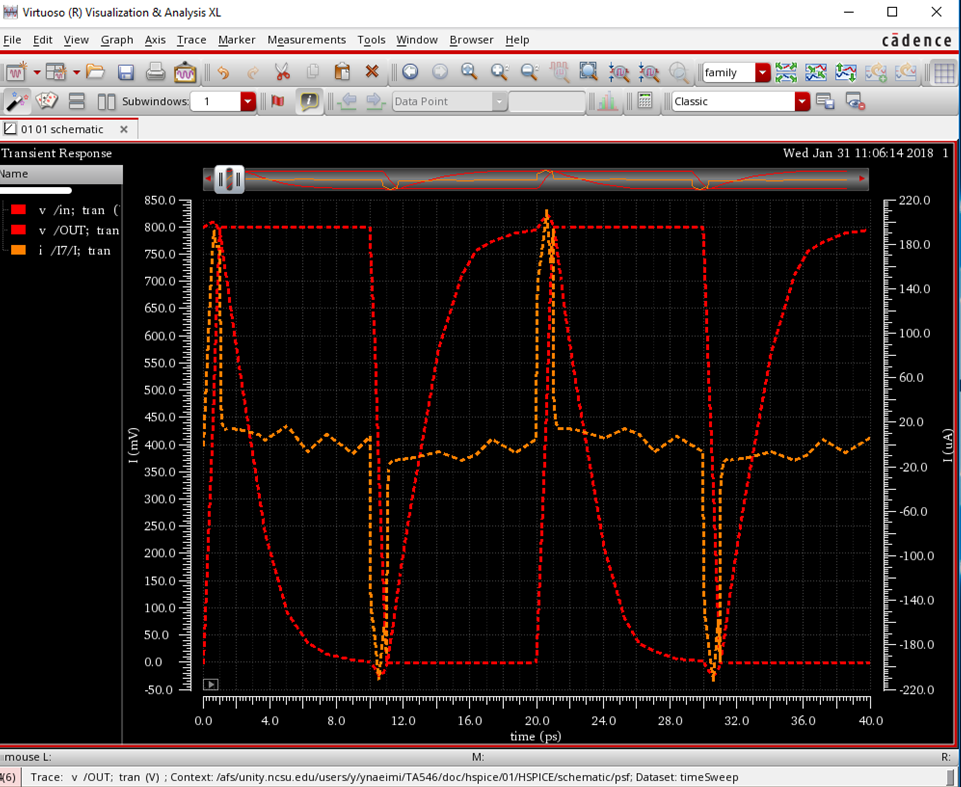
Figure bellow shows the menu for transient analysis.
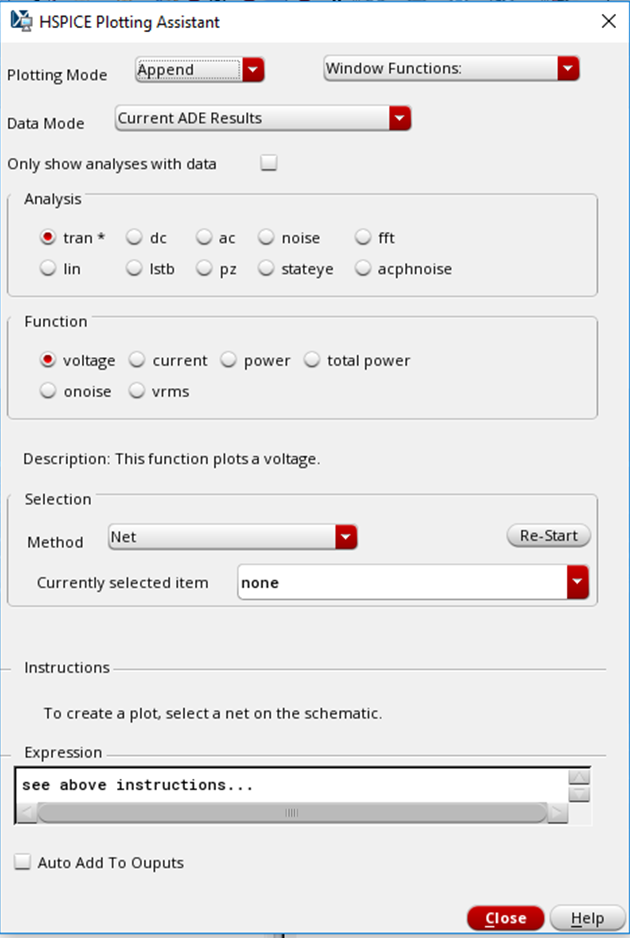
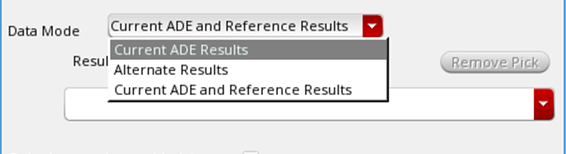
On Data Mode drop-down select Current ADE Results option. This option uses results from your current ADE session.
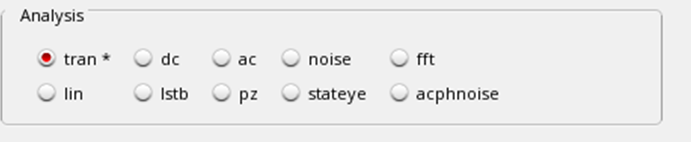
In Analysis section of HSPICE Plotting Assistant menu choose tran. This is to specify the analysis you want to plot for.
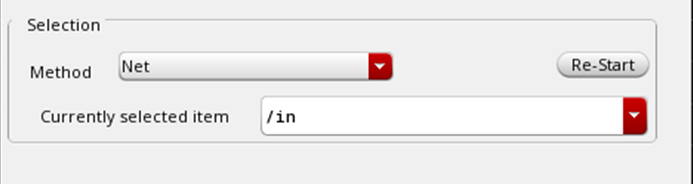
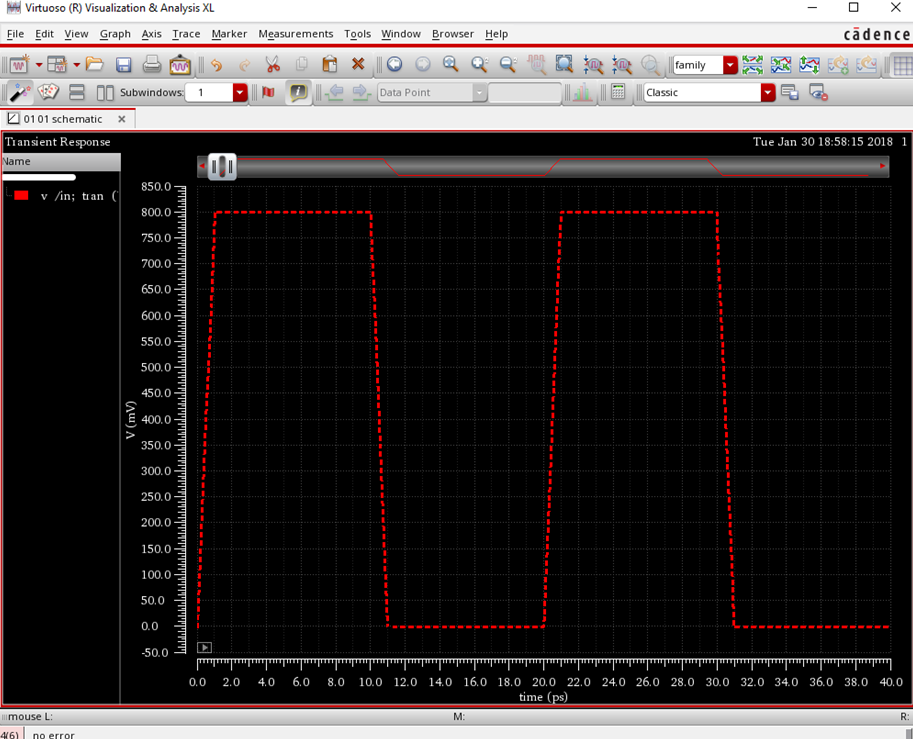
In Selection section for Method drop down menu select Net and select in wire and OUT pin on the schematic. Net name, here in, will appear in Currently selected item.
As you select in wire on schematic voltage waveform appears on Virtuoso ® Visualization & Analysis XL window.
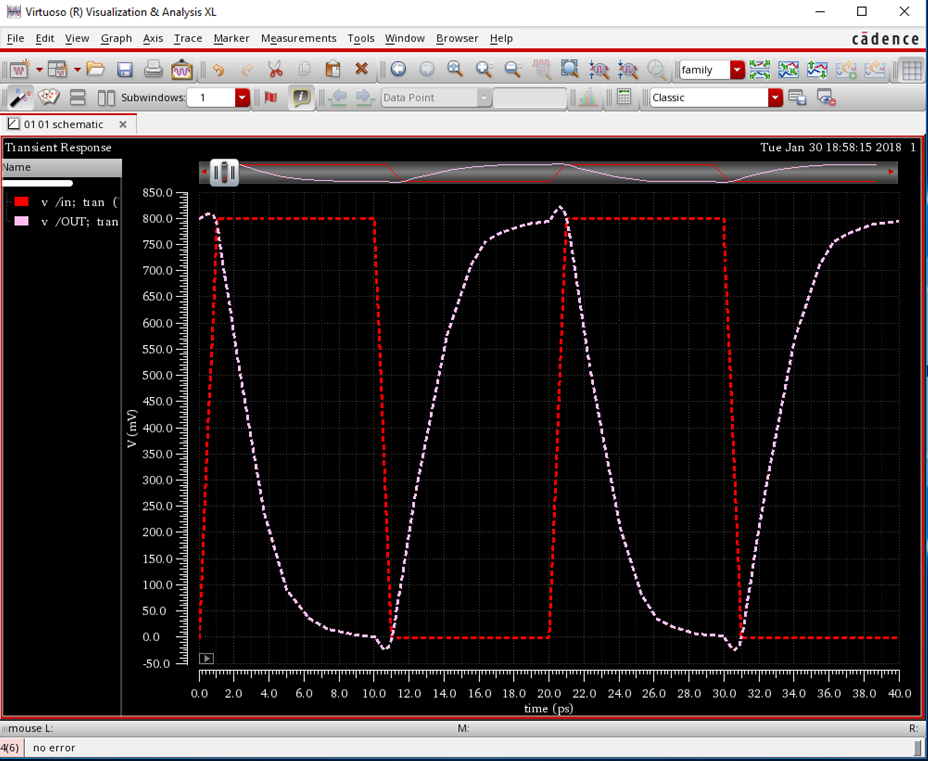
You can plot voltage on other nets by pushing Re-Start button on Selection section and choose the other net, OUT here, and voltage on that net will pops up on Visualization & Analysis XL.
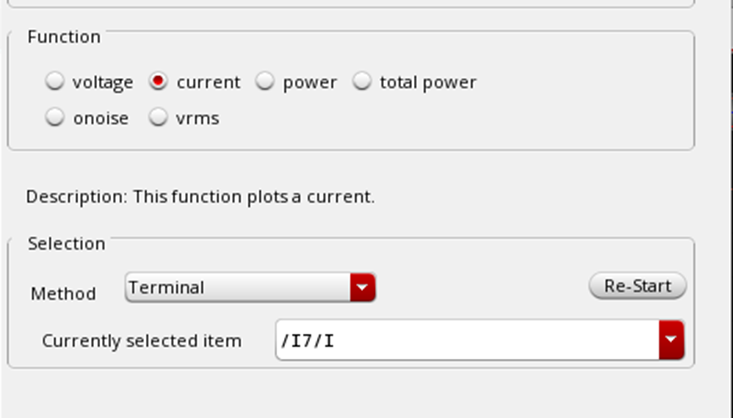
For plotting input current of inverter you can select current under Function section of the HSPICE Plotting Assistant.
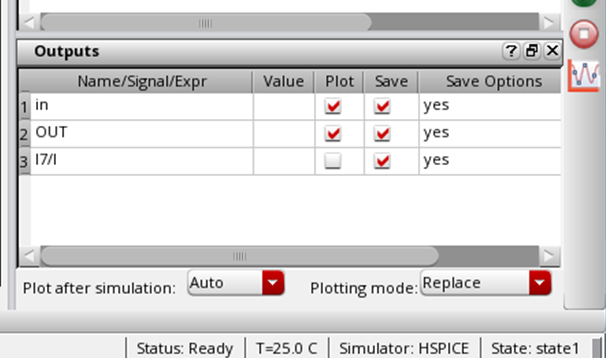
Make sure add input current of inverter to output at ADE L and run the simulation again.
Then push Re-Start (in HSPICE Plotting Assistant) button and select input of inverter and the waveform pops up at Visualization & Analysis XL.
Adding synopsys HSPICE Measurement Statements
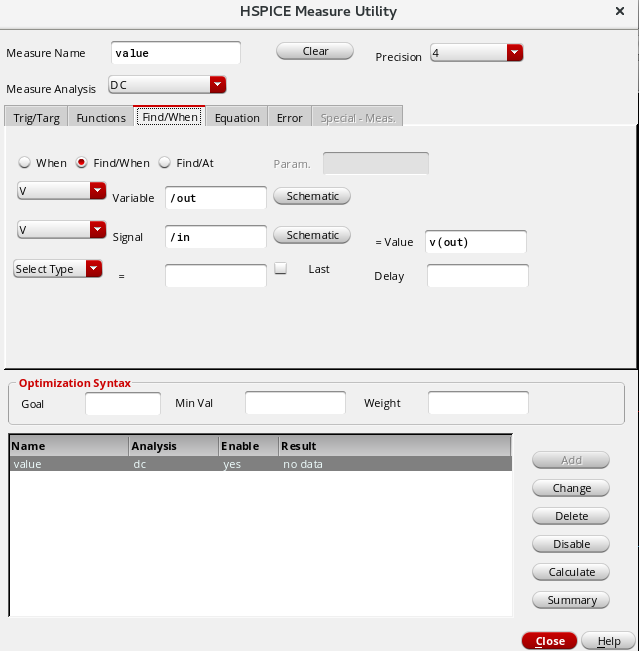
From ADE L -> Tools menu select HSPICE Measure Utility…
In the opened window select the Find/when tab.
Set the measure value to be a variable example: “value”
Select DC analysis.
Select Find/When
select variable on the schematic as the V(out)
select signal to be measured as v(in) and set its value to v(out) . We are trying to find out the v(out) value when v(in) equals v(out). This should be equivalent of adding .MEASURE DC result FIND v(out) WHEN v(in)=v(out)
in the netlist.
Click on the Add button and you should see the following.
In the ADE L terminal run the DC analyis. Then in the HSPICE Mearure Utility click on Calculate.
The result is shown in the result column as below.
